$4.95 / mo
Tutorial: An overview of all the features in RVO
A walkthrough of all the features in REALvision Online

REALvision Online is created to make it easy to slice your 3D model. So hopefully, you agree that we managed to make it so. In this post, you will get a walkthrough of all the features of REALvision Online. You can dive into specific features, or watch this video walkthrough:
An overview of the Dashboard
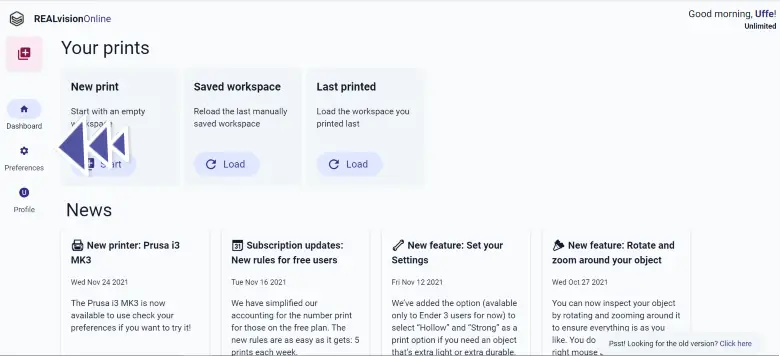
When you first log in to REALvision Online you will find yourself at the dashboard. From here you can start a new print or you can reload a saved or your last printed workspace.
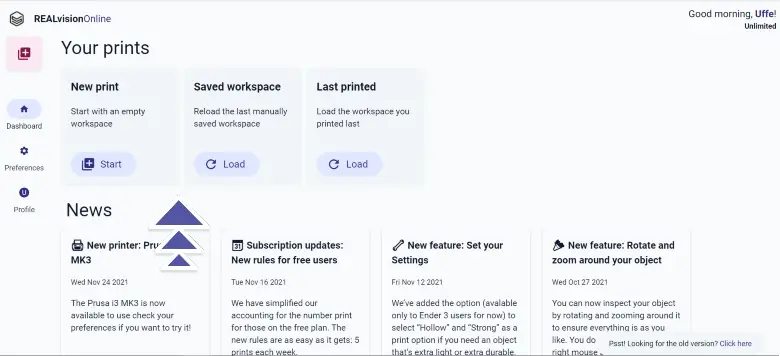
When we add a new feature or printer, it is announced in the News section which you find just beneath.
How to select your printer?
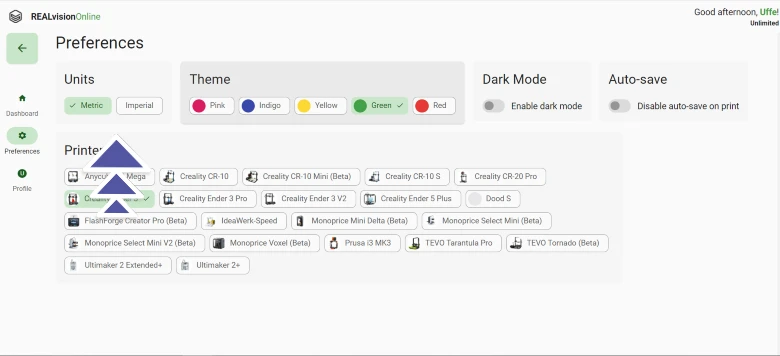
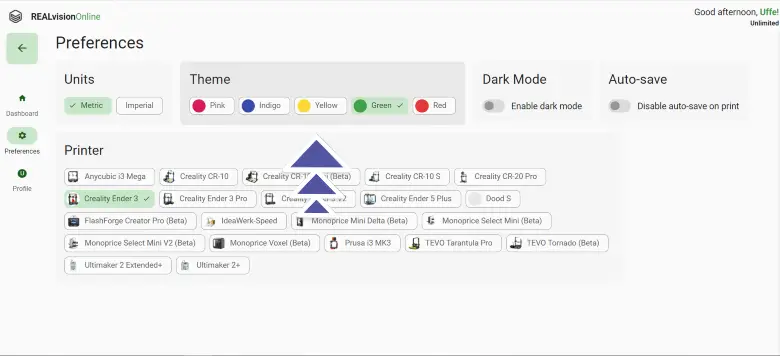
Before you print, you shall choose your printer. This is normally done doing the sign-up process, but if you need to switch printer you click the “Preferences” tab in the left menubar, and you will be taken to a screen, where you can select your printer.
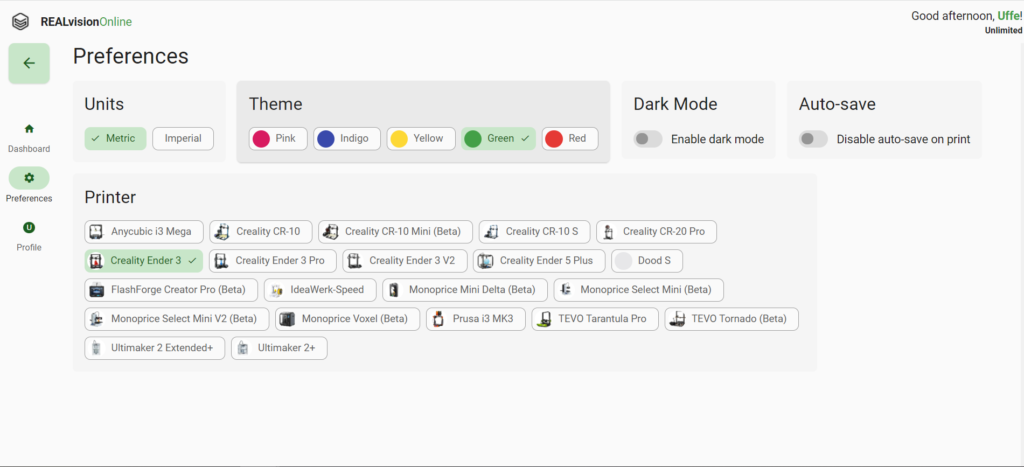
When you choose a new printer in REALvisionOnline, you will see that the surface changes in the workspace area, and you can now place your model correctly.
List of compatible printers
- Anycubic i3 Mega
- Creality CR-10
- Creality CR-10 Mini (Beta)
- Creality CR-10 S
- Creality CR-20 Pro
- Creality Ender 3
- Creality Ender 3 Pro
- Creality Ender 3 V2
- Creality Ender 5 Plus
- Dood S
- FlashForge Creator Pro (Beta)
- IdeaWerk-Speed
- Monoprice Mini Delta (Beta)
- Monoprice Select Mini (Beta)
- Monoprice Select Mini V2 (Beta)
- Monoprice Voxel (Beta)
- Prusa i3 MK3
- TEVO Tarantula Pro
- TEVO tornado (Beta)
- Ultimaker 2 Extended+
- Ultimaker 2+
The printers marked with (Beta) are currently in the test phase.
How to request a new 3D printer?
We continuously add new 3D printers to REALvision Online. When deciding which printer to add next, we pick the one that most users have requested. If your printer is not on the list, you can request it here.
How to switch from mm to inches
From the preferences menu, you can pick display units.
Metric means that your model’s length, height, and depth are shown in millimeters, where imperial shows the parameters in inches.
How to change theme colour of your workspace
From the preferences menu, you can also change the theme color, so you can see everything in your favorite color.
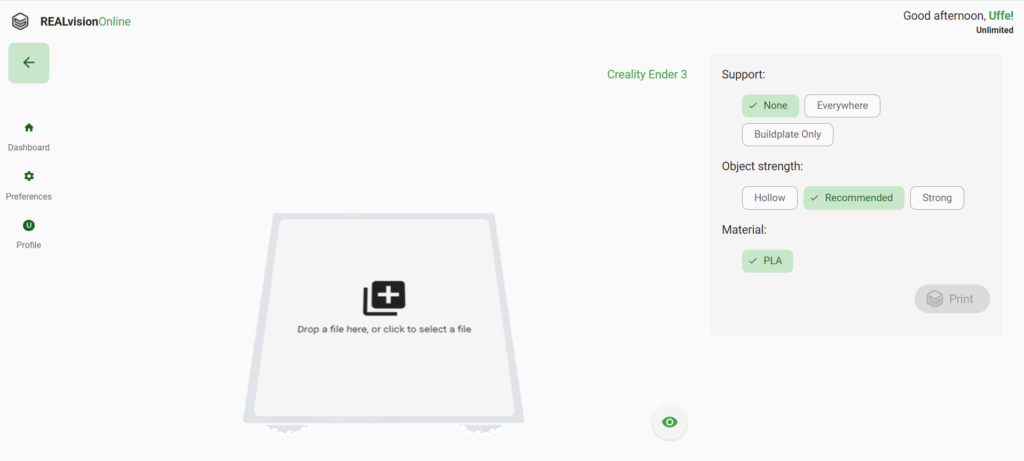
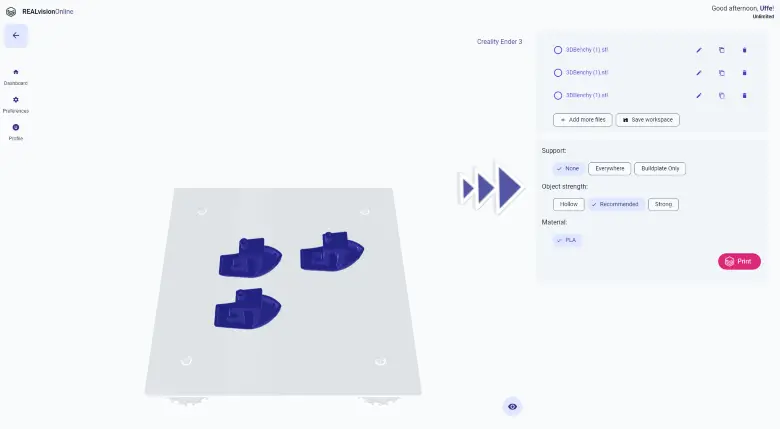
An overview of the slicing workspace
When entering the slicing workspace, you will see your printer bed, with a large plus sign. Click the plus or drag an stl. file onto the print bed to upload your file, and visually see it.
If you click the little eye icon or click your right mouse button, you can rotate around your workspace, and ensure that everything is as you like it.
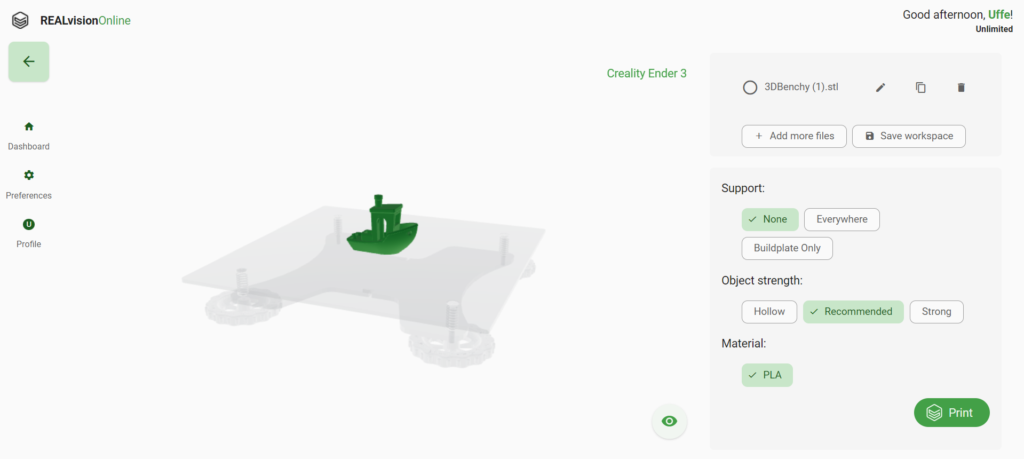
To the right, you can see the name of your file. Next to it, there are three buttons. (Pencil) Rotate and scale your object (Files) Duplicate your object (Trashbin) Remove your object.

Underneed your find the buttons to print multiple objects and to save your workspace.
In the third box, you will find your printer’s configuration- and material options. The configurations- and materials options can vary for each printer. We are constantly adding new configurations and materials, to make a better slicing experience. If you would like to know when something new will be added to your printer, please write us at uffe@realvisiononline.com
How to rotate and scale your model
You can rotate your object by double-clicking on it or clicking on the pencil button next to your object’s name.
When entering the rotation screen you will see three circles. Each of them represents an angle. Click and drag each of them to rotate your model.
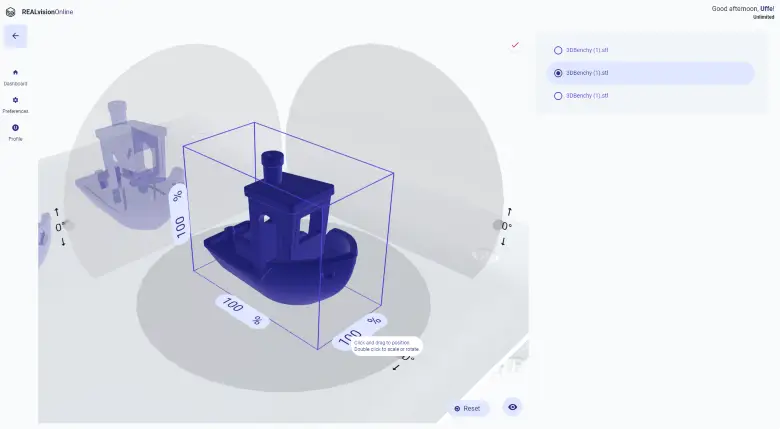
To scale, just click to 100 number, and make your adjustments. If you would like to see the actual size, just click the % sign.
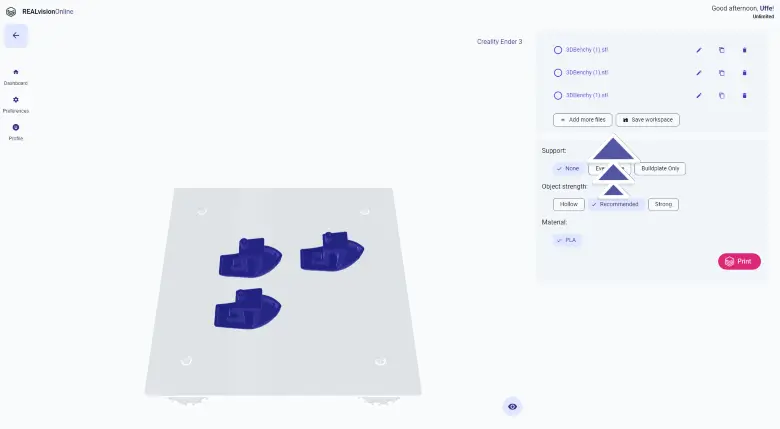
If you have multiple objects on the bed, you can switch between them using the menu to the right.
How to print multiple objects
When you are inside a workspace, you can click the “Add more files” buttons in the top-right menu. If you would like to print two examples of the same file, you can click the file’s icon to duplicate your first file.

How to save your workspace
In REAlvision Online you can save a workspace and come back to it at any time. To do so, you click the “Save workspace” button in the workspace area.

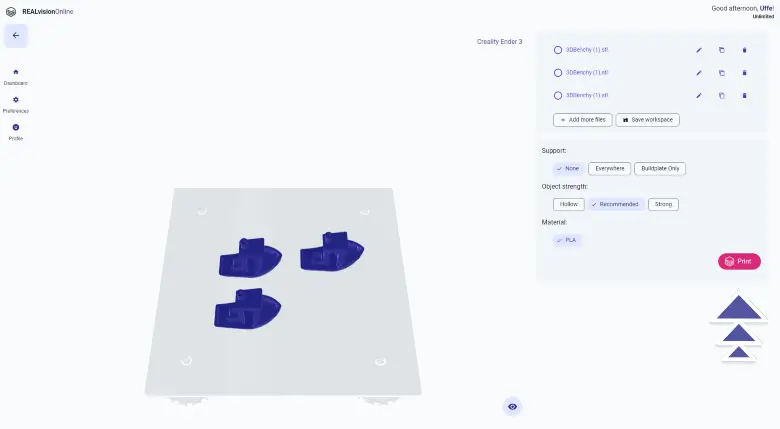
How to increase the strengt of your model
If you print on a Creality Ender 3, you can choose between three printer profiles, and thereby increase the infill level and the strengths of your model. This feature will also be available for all other printers doing 2022.

You can choose between:
Hollow: 0% infill – suitable if you would like a fast print and a flexible model.
Recommended: 15% infill – This option is correct for most prints. It balances the strengths and gives you a good print speed
Strong: 30% infill – Gives you a strong object, but also increases the print speed.
How to select print support type
If your model requires support pillars to hold the edges doing the printing, you can select support in the right menu of the workspace.
REALvisionOnline supports both touching building plate and everywhere support.

How to start a slice of your model?
When you are happy with your model, it’s time to make it ready for your 3D printer. This process is called slicing. You can start slicing by clicking the red print button in the right bottom corner in the workspace area.
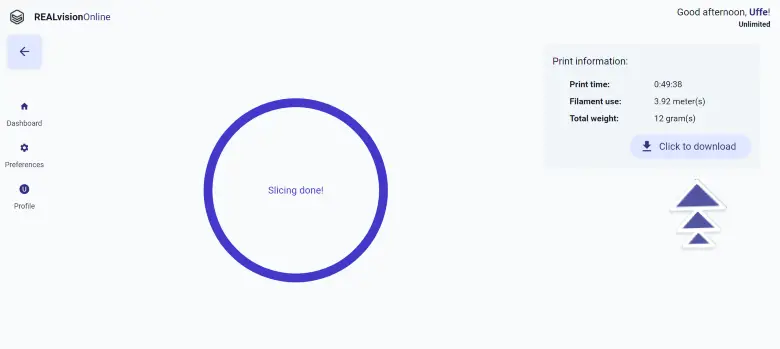
How to find your print time, filament used and object weight?
After you have sliced your object, REALvisionOnline will start converting your model to an STL to a G-code that your printer can read. When finished, you will see an estimated print time, estimated filament needed and the weight of your object in the menu to the right.
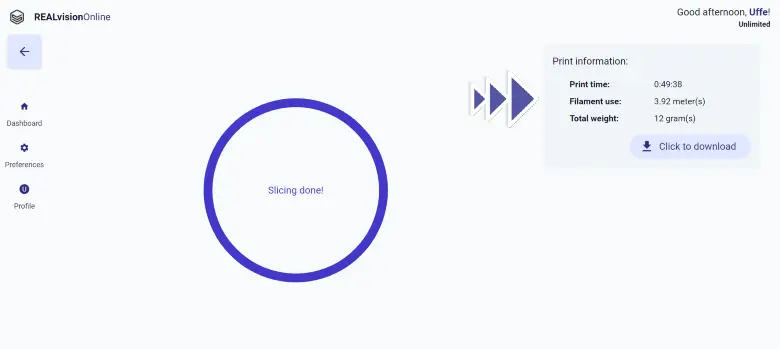
How to download your model
When your model is prepared, you click the little red download button from the right menu. Your model will then start downloading. When it is finished, you click the button again, to choose a location for your file.
How to see how many free premium prints you have left
In REALvisionOnline you have 5 free prints at your disposal every week. When you have used the 5 free prints you will be given 5 new free prints the next Monday. You can upgrade to premium to get unlimited prints.
You can see the number of prints you have left in the top right corner.
What to do with your file after downloading
To insert your STL file into your printer, you usually need to place it on a USB stick or an SD card and then insert it into your printer.
How to contact support or give feedback
We hope you find REALvisionOnline intuitive. You can contact us at support@realvisiononline.com
