$4.95 / mo
How to bed-level your 3D printer?
Everything you need to know about bed leveling your 3D printer.

Maintaining a properly leveled print bed (build plate) is crucial for successful 3D printing, and checking it regularly or in specific situations will help you to get better print quality. But how to do bed leveling, when to do it or you might even ask what is bed leveling? We are here to help you.
What is bed leveling?
Bed leveling is adjusting the print bed’s height to ensure it is the appropriate distance from the print nozzle across its entire surface.

Why is bed leveling important?
A properly leveled bed reduces the likelihood of print failures and improves print quality. It plays a crucial role in achieving a good first layer for all your prints that is very important for successful prints.
What can happen if the print bed is not properly leveled?
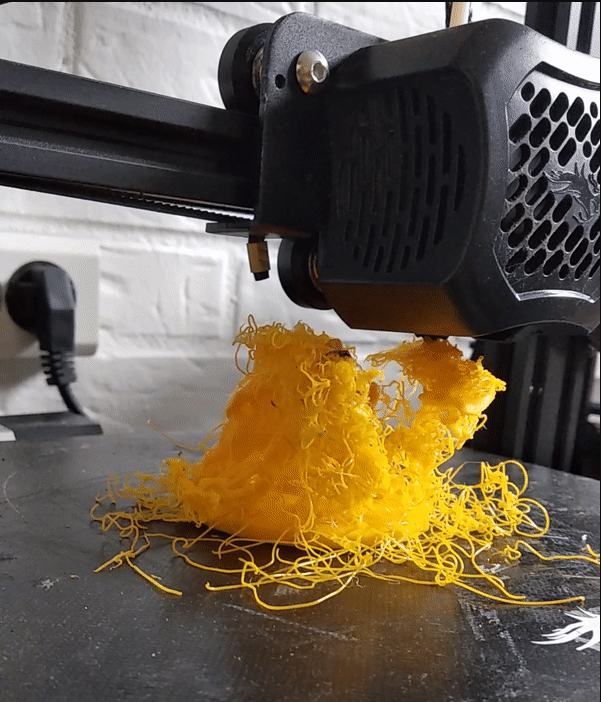
- If the print bed is too far from the nozzle: the first layer of filament might not stick to the print bed
- If the print bed is too close to the nozzle: the first layer will be very thin and the nozzle might scratch the print bed
When to level the print bed?
You should level your 3D printer’s bed under the following circumstances:
1. Initial setup: When setting up your 3D printer for the first time, it’s essential to level the bed to ensure proper printing.
2. After transportation: If you’ve moved your 3D printer, vibrations or changes in position may affect the bed leveling. Check and adjust it accordingly.
3. Periodic maintenance: Regularly check and level the bed as part of your printer maintenance routine. This helps prevent issues and ensures consistent print quality.
4. Print issues: If you notice problems such as uneven layers, adhesion issues, or poor print quality, re-leveling the bed may be necessary to address these issues.
5. Temperature changes: Extreme temperature changes can cause materials to expand or contract, affecting the level of the bed. Check and adjust the bed level if there are significant temperature variations in your printing environment.
6. Print bed replacement: If you replace the print bed or make modifications to your printer’s hardware, re-level the bed to accommodate these changes.
Some printers have automatic bed leveling. This means that the print bed is leveled automatically with an automatic bed leveling sensor. However, it can still be a good idea to level it manually from time to time.
What do you need for print bed leveling?
To level the print bed of your 3D printer, you typically need a few basic tools. The specific tools required may depend on your printer’s design, but here’s a general list:
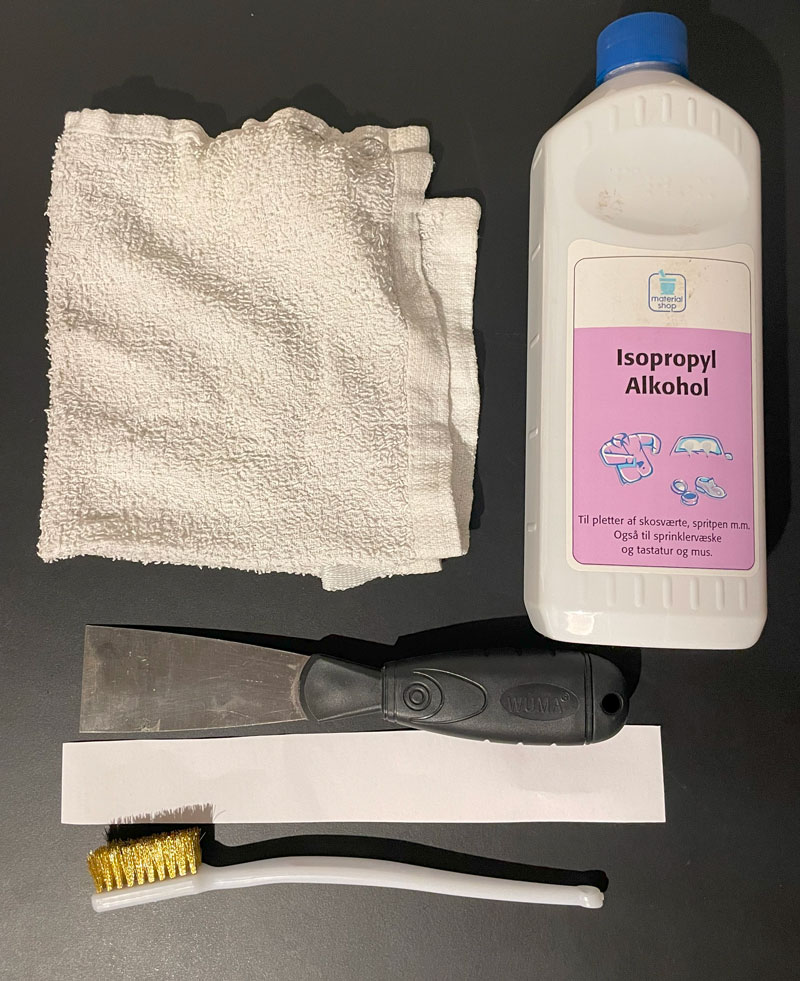
- A piece of paper or a feeler gauge: To measure the distance between the nozzle and the bed a thin piece of paper will be perfect if you don’t have a feeler gauge. The best is to use a receipt paper you get when purchasing in shops because it is thinner (0.06 mm thin) than traditional copy papers (0.11 mm thin). This helps you determine the proper leveling height.
- Bed leveling knobs or screws: If your 3D printer has manual bed leveling, you’ll need to access and adjust the leveling knobs or screws. These are typically found near the corners of the print bed.
- A clean, dry cotton cloth: Easily remove dust and grime with these common household items.
- A brass brush: A mini brush (or something similar) is nice to have to clean the nozzle.
- A razor (or plastic) blade or a spatula: To make it easy to remove, scrape residue from the surface of the print bed. Be careful not to scratch the print bed.
- Isopropyl alcohol: it removes dirt and fat from a build surface. Usually, it is not an issue but make sure to check that the build surface can handle the cleaning agent.
Tip: A Bubble Level can help ensure that your printer is on a flat surface. This can be useful for identifying any overall tilt in the printer.
Some 3D printers come with specific tools for bed leveling. For example, some printers use leveling springs to provide flexibility when leveling the bed. Check if your printer has leveling springs that might need adjustment. Refer to your printer’s manual for any manufacturer-provided tools or guidelines.
How to level the print bed?
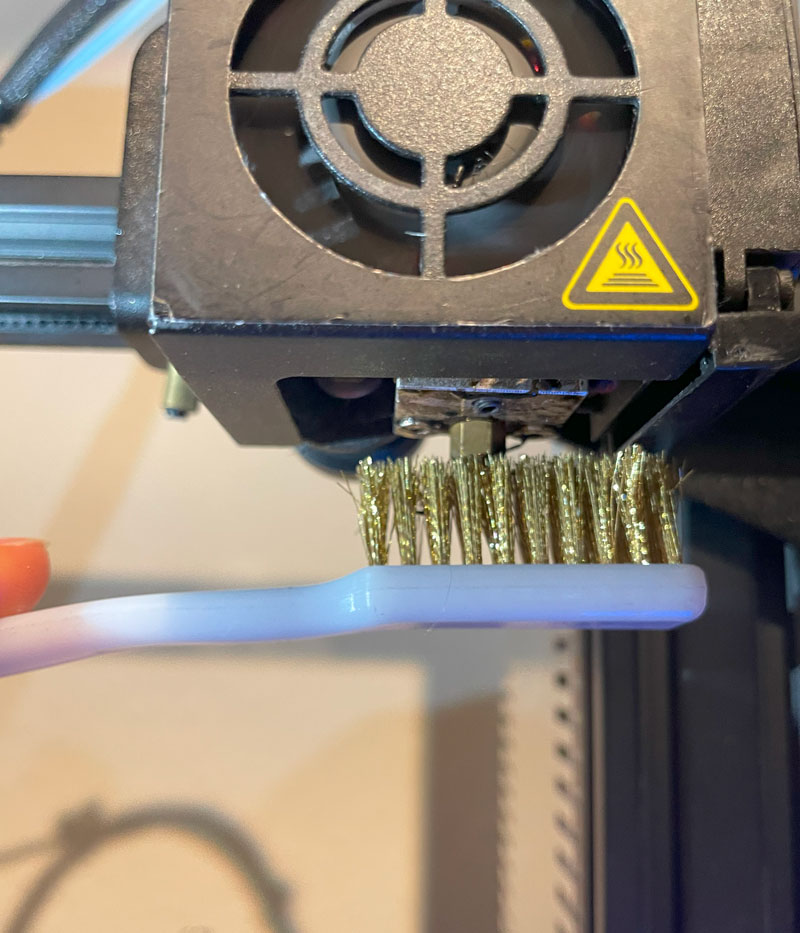
1. Clean the nozzle
It is important to remove any residual plastic from the tip of the nozzle. You can use a dry cotton cloth. The goal is to make sure that the gap between the bed and the nozzle is clear.
First you need to heat the nozzle. You can use a brass brush to clean around the tip. Be careful not to overdo it, because the nozzle may be damaged by the hard brass bristles.
Don’t touch the nozzle, it is hot.
2. Clean the print bed
For hard build surfaces such as glass, you can use a razor blade or a spatula to scrape off any large residue and debris.
After that, you can wash the build plate. If it can be removed, you can clean it in the sink with ordinary dish soap and lukewarm water. For a non-removable build plate, you can use isopropyl alcohol on a paper towel or cloth. After that, dry it with a soft cloth.
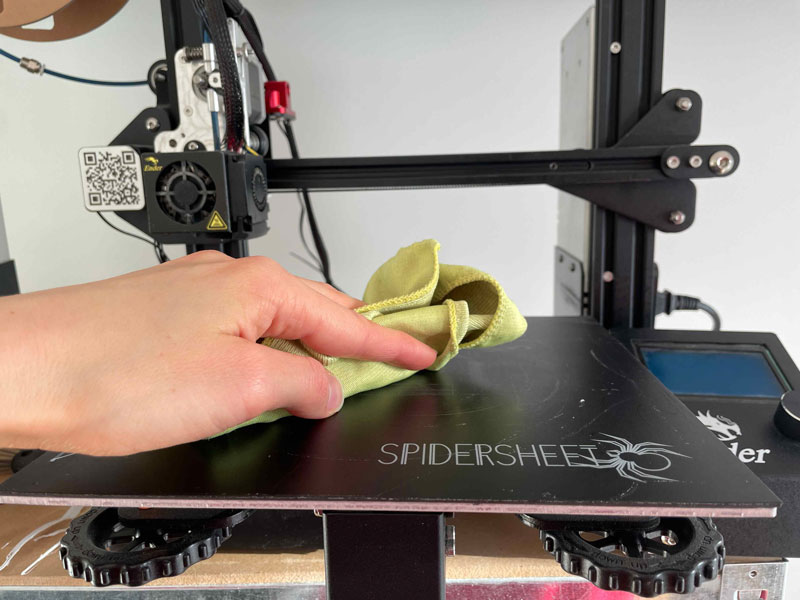
Try not to touch the clean build surface with your bare hands because the plate can get oily from your skin. Prints will not stick well if there is any grease on the surface. For different types of build surfaces, other techniques may apply, so be sure to check your 3D printer’s manual to avoid damaging its surface.
3. Level the print bed
There are three cases here considering the type of leveling method your printer uses:
- If your printer has an automatic bed leveling feature: Obviously, this is the easiest case. This means that the print bed is leveled automatically with an automatic bed leveling sensor. You have nothing to do, the printer does everything by itself before it starts to print.
- If your printer has an assisted bed leveling feature: To level your print bed you need to go through the bed leveling procedure in the settings menu on the printer. Note that you can both choose a full calibration, and an adjustment depending on your needs.
- If your printer has none of the above, it has to be leveled manually. Follow the steps below.
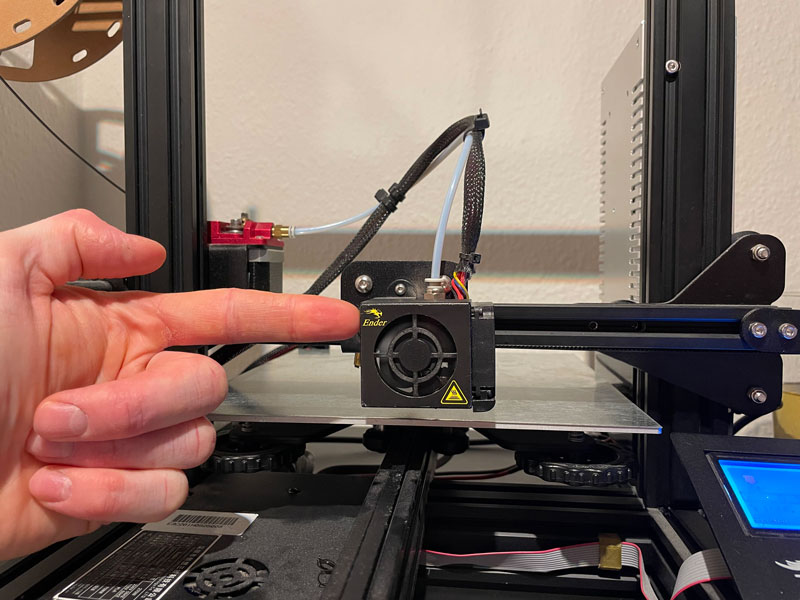
- It is recommended to heat up the printer before the bed leveling to ensure precise leveling.
- Go to the Menu and find the Auto home option. Then your print head will go to a starting position.
- Go to the Disable steppers option. This will enable you to move the print head into different positions manually, just by hand.
- Move the print head gently to five different positions, as marked on the illustration below.
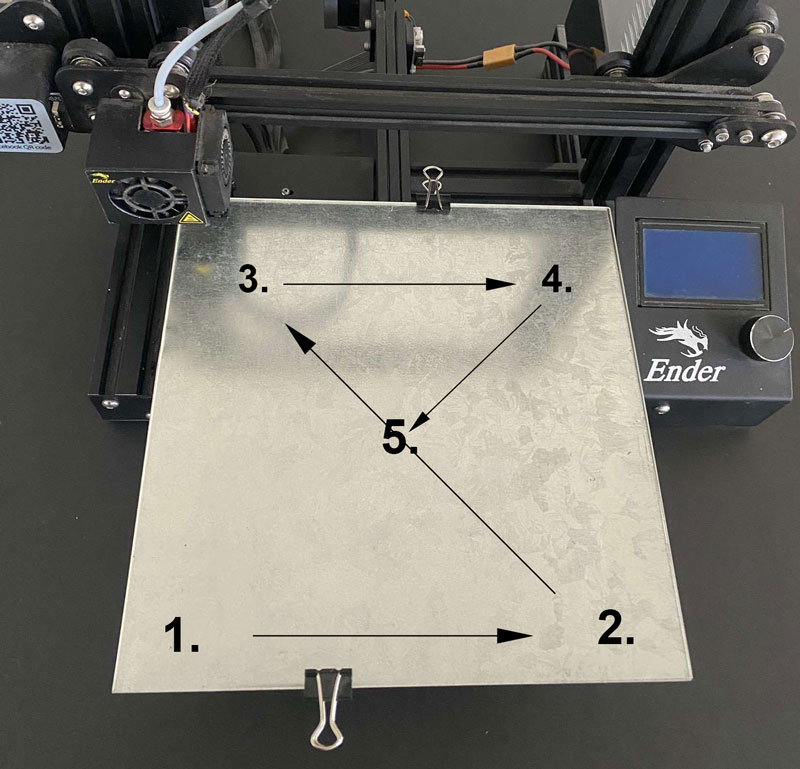
Bed leveling order - At each point, you need to make sure that the nozzle is not touching the print bed. You need to adjust the distance between them by turning the bed leveling knobs under the print bed to right and left. When turning it to the right the bed goes down – further from the nozzle, when turning it to the left the bed goes up – closer to the nozzle (see the picture below). Try to place the piece of paper in between the nozzle and the print bed and move it back and forth to test the distance. The distance between them is good when the paper just fits in, and when you move it, you feel a slight vibrational tension.
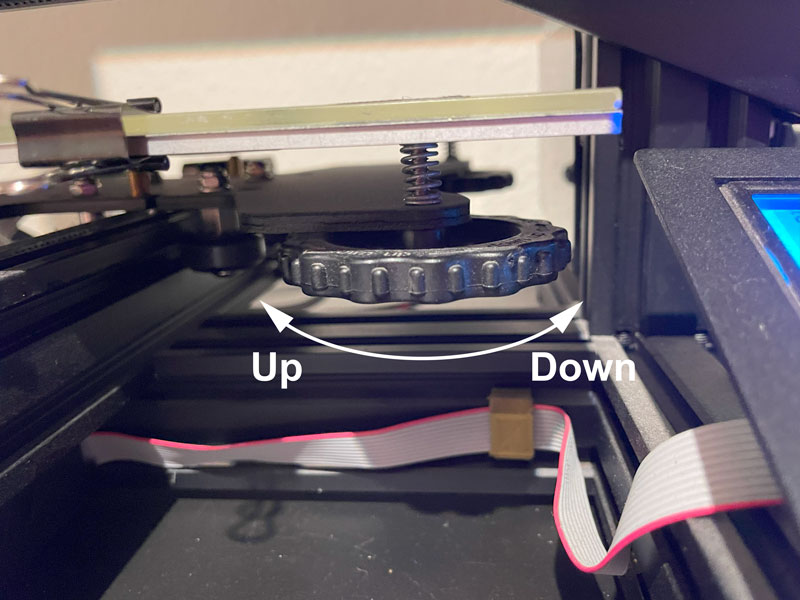
Bed leveling knob
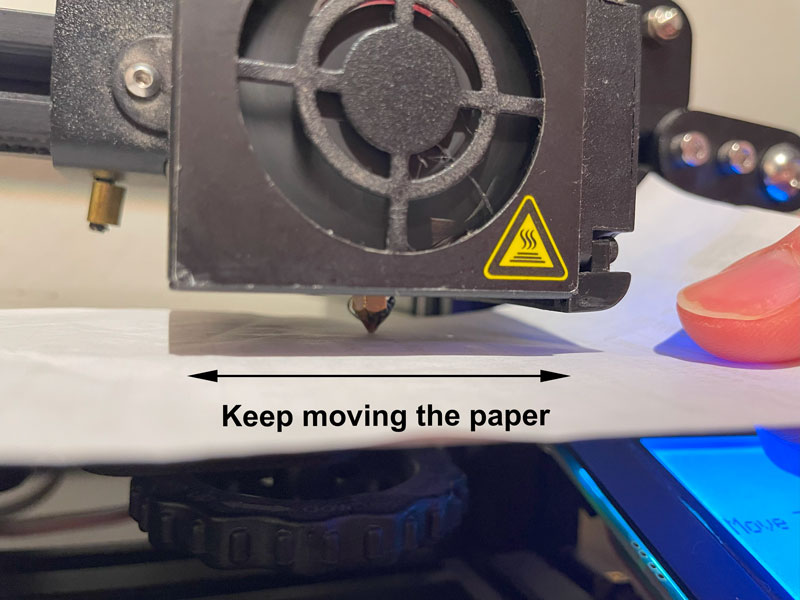
Checking the distance with a paper - Repeat this whole process 3 to 5 times, or until the adjustments you need to make are minimal or almost nothing.
4. Test the bed leveling
You need to print a bed leveling test. You can find tests like this on Thingiverse for free. Here are a couple of examples.
Bed leveling files:
https://www.thingiverse.com/thing:5174552 – Bed level stripes test
https://www.thingiverse.com/thing:2187071 – Bed level square test
https://www.thingiverse.com/thing:3235018 – Ender 3 bed level test
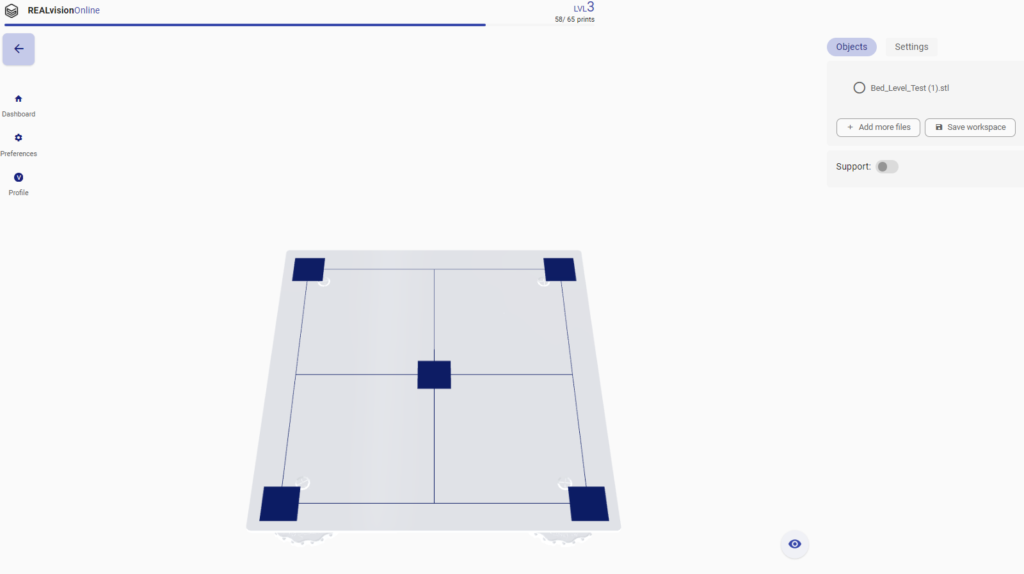
- Download the STL file from Thingiverse
- Import the file into REALvision Online
- Press Print, a file downloads that you need to import into an SD card and place it into your printer
- Start the print as you normally would and when done, examine the result as per the following section.
-
Examine the first layer:
A successful first layer should be consistent and should look the same over the whole surface.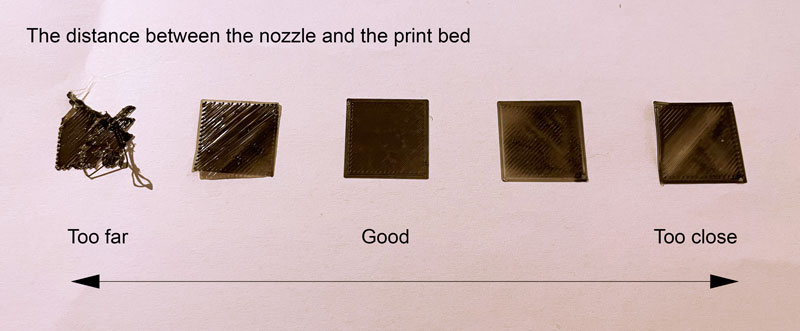
The illustration shows how it looks when the nozzle is too far or too close to the print bed.
You need to look for the following problems:
– The layer is very thin, and hardly visible or even missing some places.
– The filament does not stick to the print bed in certain areas.
– The filament’s height and width vary across the build surface.
– The gaps between lines of filament vary across the build surface.
To correct these problems you need to level the print bed again, but now you can see where the adjustments are needed.
I hope this guide clarified your questions about bed leveling and helps you to get great print results.
Happy printing!✌️
Are you having issues with your 3D prints? Check out our troubleshooting guide here!
Start printing with REALvision Online
