$4.95 / mo
How to spot if your 3D print needs support
To support or not to support..? The existential question in 3D printing. When starting with 3D printing there are a few terms you need to get your head around. One of them is how and when you should add supporting structures to your prints. And this one can determine the success of your prints. In […]

To support or not to support..? The existential question in 3D printing.
When starting with 3D printing there are a few terms you need to get your head around. One of them is how and when you should add supporting structures to your prints. And this one can determine the success of your prints.
In this post, I will tell you all you need to know about support, so you can decide if you need to tell your slicer to build it or not.
What is support
Support is short for “support structures”. These structures are thin strings of filament that your printer places to make sure that all your models’ layers are held at the right place doing the printing.
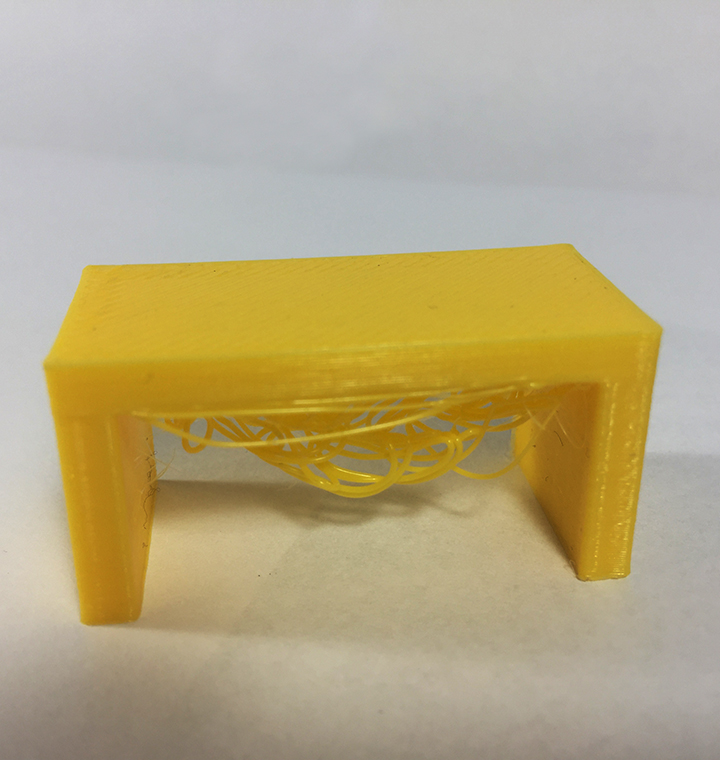
Here is a deeper explanation: Your 3D printer prints one layer on top of another layer, starting from the bottom layer. Imagine that you are printing a classic medieval bridge, then your printer will start with the four pillars, and end at the middle of the bridge. In this example, the middle of the bridge is the 10th layer, and because there are no layers below it, it will be printed into thin air.
To print a bridge, you will need to enable support, so the supporting structures can hold the middle of the bridge while printing. I have tried to print this simple bridge without support to illustrate the problem of not having support:
When to use support?
Support at overhangs
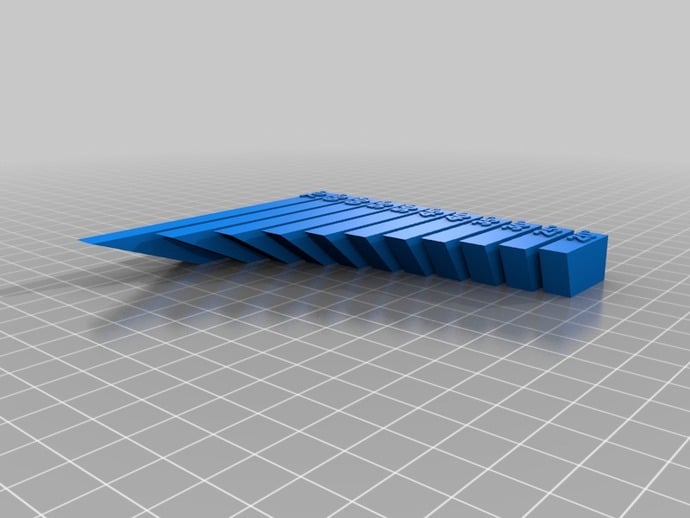
How to decide whether to use support? In the case of overhangs, according to the 45 degrees principle, if the angle of the overhang structure from the vertical is less than 45 degrees, you can print without adding support. If the overhang is larger than 45 degrees from the vertical, a support structure is required.
But the situation is often not that black and white. Depending on the nozzle diameter and other settings a 3D printer can cleanly print overhangs with an angle between 45-60 degrees. I suggest experimenting with what your printer can “comfortably” do. You can use this model to test your printer. It’s designed to test angles from 20° to 70°.
Support on bridges
In the case of bridges, the rule of thumb is: if a bridge is less than 10 mm in length, the printer may be able to print it without support. If this distance is longer, support is necessary for good print results. Again, this is just a general rule, I recommend testing your printer first. You can use this bridging test model.
Setting support in REALvision Online
In REALvision Online you can set the support using the toggle in the Objects menu.
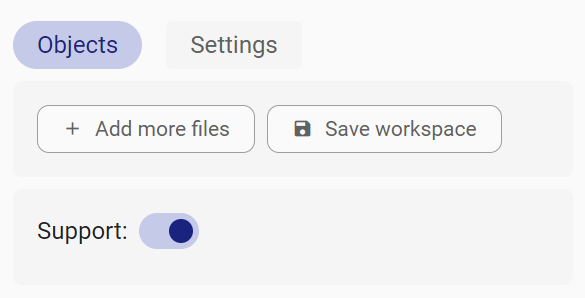
When the support option is on, support is automatically built where it is necessary for a good print result. The placement and the amount of support are defined by the software so you don’t need to worry about these details. In some cases, depending on the 3D printer and the 3D model, raft and brim are also printed automatically.
The drawback of using support
Support structures require extra material that will need to be removed and end up as waste. This will increase the cost of the 3D-printed part. Besides increased material usage, you also need to count on longer printing time and the time for post-processing – removing the support.
The irony is that support structures are used to improve print quality but in the end, it can also result in lower print quality. Sometimes it is difficult to remove the undesired material and it will leave marks such as small dots on your model. In the worst case, part of the model can break off together with the support structure.
Because of these reasons, it is the best practice to minimize the use of support structures and use them only where necessary. It of course mostly comes off to the design but you can also help with placing your model on the print bed in an orientation that requires the least amount of support or it requires no support.
How to effectively remove support from your model
If you are lucky you can remove the supports just by your bare hands. However, mostly you will need a tool or two to completely get rid of the extra material. There is a wide range of tools you can use:
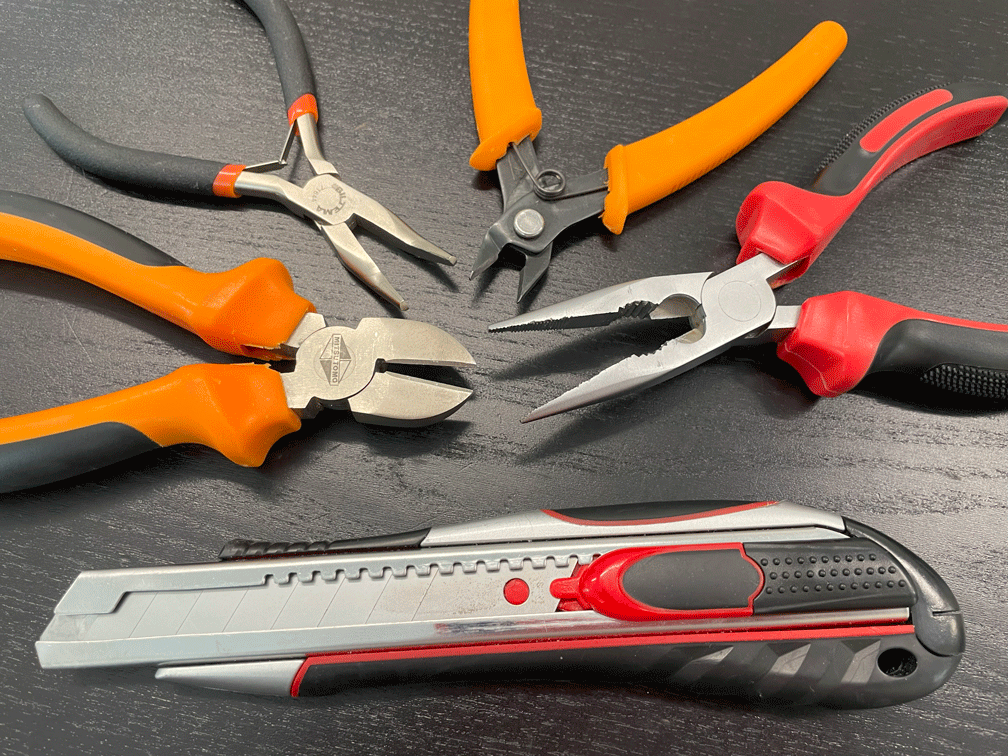
You can use a craft knife to cut away parts to get better access to the rest of the support or to go along the surface edges. Be careful, these are very sharp!
There are a wide variety of flash cutters available with bigger, smaller, longer or shorter heads. These can help you to reach places that are hard to approach and for cutting off pieces that are tough to remove by hand.
Additionally, you can also get good use of tweezers and files for the more detailed parts and for smoothening the surface after the support removal.
